
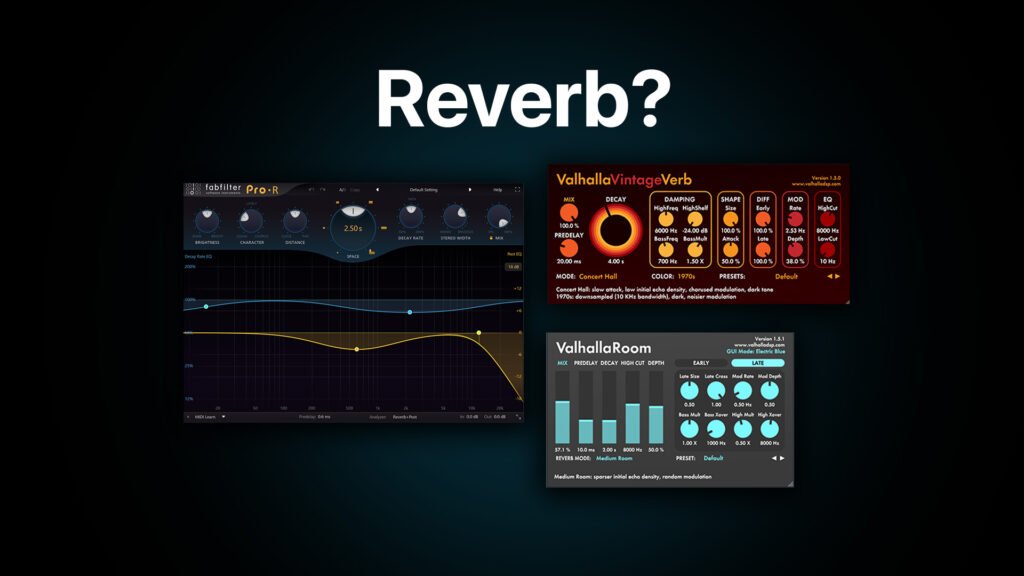
What is Reverb?
What is Reverb and How Does it Work in Music Production?
Reverb is a crucial tool in the music production process. It is used to create a sense of space and depth in a mix, and can be used creatively to enhance the emotional impact of a song. But what is reverb, exactly, and how does it work? In this article, we will explore the basics of reverb and its importance in music production.
What is Reverb?
Reverb is a natural phenomenon that occurs when sound waves reflect off surfaces in a room, creating a complex pattern of echoes that persist after the sound source has stopped. In music production, a digital reverb effect is used to simulate this effect, creating the illusion of space and depth in a mix.
How Does Reverb Work?
Reverb works by adding a series of delays to a sound source, simulating the reflections that would occur in a physical space. When a sound is played through a reverb effect, it is sent to an algorithm that creates a series of echoes based on the parameters set by the user. These echoes are then blended together with the original sound to create the illusion of space.
Types of Reverb
There are many types of reverb that can be used in music production, each with its own unique characteristics. Some of the most common types include:
- Plate Reverb – Plate reverb is a type of reverb that uses a large metal plate to simulate the reflections of a physical space. It is known for its warm and smooth sound.
- Hall Reverb – Hall reverb simulates the sound of a large concert hall, creating a sense of grandeur and space.
- Room Reverb – Room reverb simulates the sound of a smaller room, creating a more intimate and natural sound.
- Spring Reverb – Spring reverb is a type of reverb that uses a metal spring to create a unique and distinctive sound. It is often used in guitar amplifiers.
Uses of Reverb in Music Production
Reverb can be used in many ways in music production, from creating a sense of space and depth in a mix to adding creative effects to individual sounds. Some common uses of reverb include:
- Creating a sense of space – Reverb can be used to create a sense of space and depth in a mix, making it sound more natural and immersive.
- Adding depth to vocals – Reverb can be used to add depth and emotion to vocals, making them sound more powerful and expressive.
- Enhancing drums – Reverb can be used to enhance the sound of drums, adding a sense of power and impact to the mix.
- Adding creative effects – Reverb can be used creatively to add unique effects to individual sounds, such as creating a haunting, otherworldly sound by using a long, decay-heavy reverb.
Tips for Using Reverb
When using reverb in music production, it’s important to keep a few tips in mind:
- Use it sparingly – Reverb can quickly overwhelm a mix if it is used too much. Use it sparingly to create a sense of space and depth without making the mix sound muddy or cluttered.
- Choose the right type of reverb – Different types of reverb are suited for different applications. Choose the type of reverb that best fits the sound you are trying to achieve.
- Pay attention to the decay time – The decay time of a reverb effect determines how long the echoes will persist after the sound source has stopped. A long decay time can create a sense of space and depth, but can also make the mix sound cluttered.
Visualizing Reverb
Reverb is like a secret sauce in music. Different types of reverbs can make a sound feel like it’s in a big hall, a cozy room, or even out in the open air. But what makes all these reverbs work? They have some key features in common, like a bunch of knobs and sliders that control how the reverb sounds. Understanding these common parts can help you create the perfect sound you hear in your head. Below, we’ll break down and show these parts, so you can see how they all connect and work together
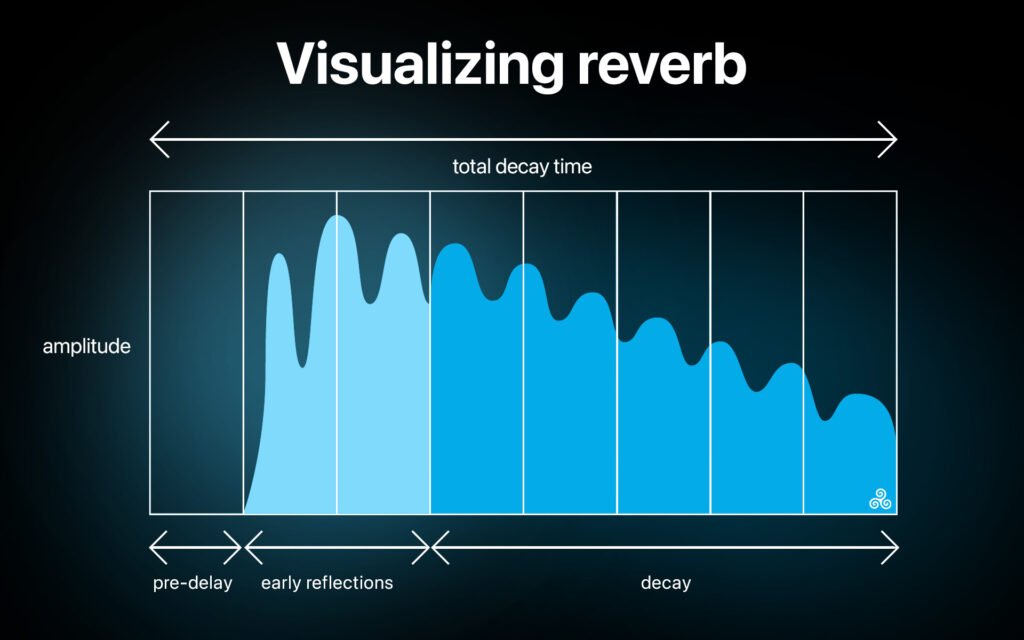
1. Duration (or Decay Time): This is a measure of how long the reverb lasts before dropping to a certain volume (typically 60 dB below its initial level). The duration parameter, also known as RT60 or reverb tail, plays a critical role in determining how long the echo effect continues in your mix. The more extended the duration, the more prolonged the echo lingers.
2. Early Reflections: The initial set of echoes that occur when sound waves bounce off an object are known as early reflections. Modulating the intensity of these early reflections can help manipulate the listener’s perceived environment. Amplified early reflections suggest a smaller room, while minimizing these can create the illusion of a larger, more expansive acoustic setting.
3. Pre-Delay: This parameter refers to the time gap between the direct sound leaving its source and the moment it generates the first echo or reflection. A slight pre-delay can help distinguish between the original (dry) signal and the reverberated (wet) signal, thereby preventing the reverb from obscuring the initial sound. A longer pre-delay suggests a larger space to the listener.
4. Frequency Attenuation (High/Low): Most reverb effects provide options to apply filters that reduce high and low frequencies. If your reverb comes across as too sharp or metallic, try attenuating it using a low-pass filter around 4-8 kHz. On the other hand, a high-pass filter can assist in cleaning up your reverb, thereby reducing any muddiness.
5. Mix (or Blend): This setting on reverb plugins helps you find the right balance between the dry (unprocessed) and wet (processed) signals. In scenarios where a reverb is used as an insert effect, you can utilize the blend setting to adjust the ratio between dry and wet components. However, if you’re using reverb as an auxiliary send on a track, you should set the blend to 100%, ensuring you only hear the reverberated signal.
Mastering these key parameters of reverb can make a world of difference to your production output. By fine-tuning these aspects, you can create a mix that truly resonates with the listener, transporting them to the exact acoustic environment you envisaged.
5 Key Tips for Using Reverb in Music Production:
1. Utilize Pre-Delay for Clarity
A small amount of pre-delay can help separate the dry sound from the reverb, giving more definition to vocals or lead instruments.
2. Apply High-Pass Filtering
Using a high-pass filter on the reverb removes unnecessary low frequencies, avoiding muddiness and leading to cleaner mixes.
3. Vary Reverbs for Different Instruments
Experiment with different types and settings of reverb for various instruments to create a more dynamic and spatially interesting sound.
4. Moderate Your Reverb Usage
A light touch with reverb often yields a more natural feel. Too much can overpower the mix, so use it sparingly.
5. Experiment with Early Reflections
Tweaking the early reflections can greatly influence the perceived size and texture of a space in your mix. Don’t be afraid to play around with this setting.
Conclusion
In conclusion, reverb is a powerful tool in music production that can add depth, dimension, and atmosphere to a sound or mix. By understanding how reverb works and experimenting with different settings and types of reverb, producers can achieve a more immersive and engaging sound, and create mixes that are both captivating and emotionally impactful. Whether you’re producing a spacious ballad, a tight pop track, or an epic film score, reverb is an essential ingredient that can take your music to the next level.


Responses